Smoked Brisket

Everything you need to know—tools, tips, and a simple recipe—to make the ultimate smoked brisket at home.
Smoked Brisket
Making a beautiful beef brisket at home is time consuming but the end result is so rewarding. Jennifer Segal
Updated:
0:00
View the print ready version of this recipe.

The ultimate Texas-style smoked brisket is all about that perfect balance: a crusty bark, juicy and tender meat, and a smoky flavor that lingers with every bite. Achieving this delicious result takes time and patience—smoking a large brisket is truly an all-day affair, so if you want to serve it for dinner, you’ll need to get started before dawn!

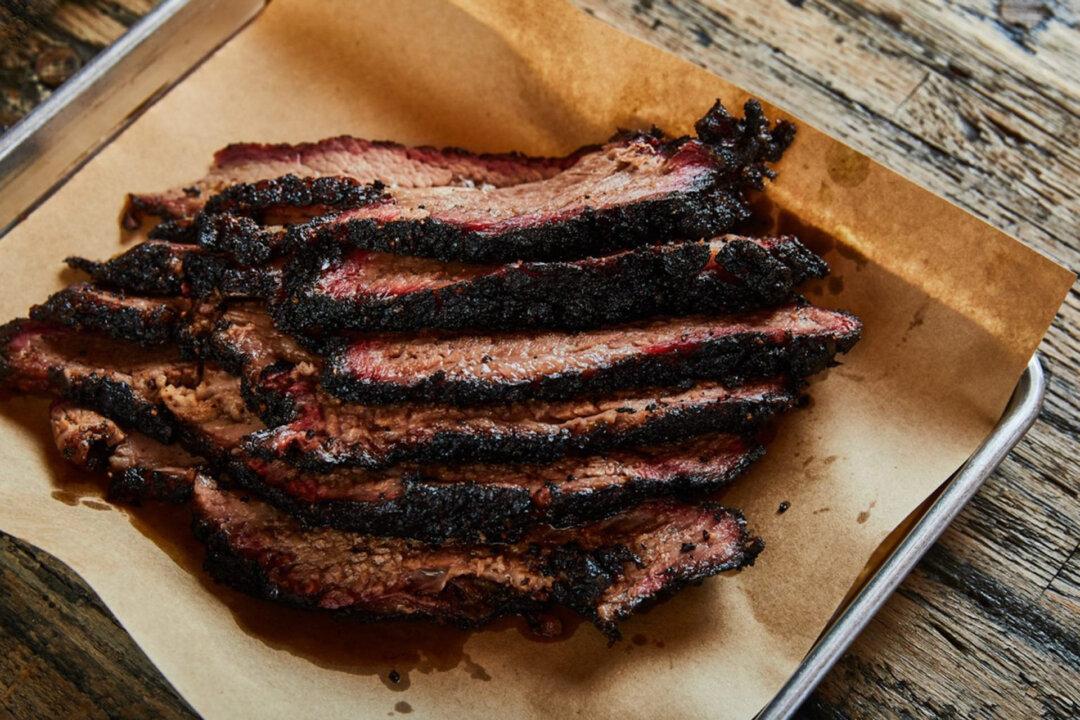
There are a few key steps to making a truly exceptional brisket:
  • Start with a high-quality piece of meat from a good butcher—you want to set yourself up for success right from the beginning.
  • Season the meat generously and let it sit in the fridge overnight—this is called dry-brining, and it works wonders for both flavor and texture.
  • Cook the meat low and slow until it reaches 165 F, then wrap it in butcher paper or aluminum foil to lock in moisture while still allowing the smoke to work its magic.
  • Finally, let the brisket rest for 1 to 3 hours in a cooler before slicing; this step is crucial for ensuring the juices are evenly distributed throughout the meat.
This is a delicious Texas-style smoked brisket recipe that’s easy to execute and follow, even if you’re new to smoking meat. Unlike many online recipes that require signature rubs you have to purchase, this one uses simple seasonings you probably already have in your pantry. If you want to dive even deeper into the world of brisket, I highly recommend checking out Meathead’s page on smoked brisket. It’s a fantastic resource that answers every question you could ever have (and some you didn’t even know to ask!) about smoking a brisket.

Essential Tools For Smoking A Brisket

  • Smoker (this is the one I have)
  • Digital meat thermometer
  • Pink butcher paper or heavy-duty aluminum foil
  • Sharp carving knife or electric carving knife
  • Heatproof silicone gloves

The Basics On Smoked Brisket

(Jennifer Segal)
Jennifer Segal

The Meat

Beef brisket is a large cut of meat from the breast or lower chest of a cow. Because this muscle gets a lot of exercise, it is a tough cut best suited to low-and-slow cooking. It is most commonly used to make Texas-style smoked brisket, corned beef, pastrami, roasted or  braised brisket, and pho.

A full brisket is made up of two overlapping muscles—the fatty, thicker point cut and the leaner, thinner flat cut. At the supermarket, you will typically see the leaner flat cut, but this is not what you want when smoking a brisket. Because it lacks fat and marbling, it’s challenging to smoke without drying out. It’s best to use a whole beef brisket, or whole packer brisket/full packer brisket, with both the flat and point cuts intact; the fat marbling in the point cut helps keep the leaner meat juicy over the very long cook time. You may need to special order this cut or go to a butcher.

To ensure a juicy brisket, it’s important to get meat that is graded USDA Prime or Choice (or even Wagyu for a splurge). If the packaging doesn’t specify, it’s likely a lower grade and you should avoid it. I highly recommend purchasing the meat from a good butcher; this way, you can ask the butcher to trim the meat for you, which is the only difficult part of preparing a smoked brisket. If you need to do it yourself, this is a good tutorial. (Be sure to leave at least a 1/4-inch fat cap on the brisket!)

The Seasoning

(Jennifer Segal)
Jennifer Segal
Many BBQ experts season brisket simply with just salt and black pepper, but I prefer to use a homemade spice rub that includes smoked paprika, garlic powder, onion powder, dry mustard, and cayenne pepper for more flavor. Either way, it’s essential to season the meat and let it sit overnight in the refrigerator before cooking. This is essentially dry brining the meat, much as you would do for a turkey. The salt in the rub not only seasons the meat but also draws out the natural juices to make a brine that then soaks back into the meat. Basically, the salt modifies the internal proteins to hold onto more moisture, making the meat juicier, and also dries the surface of the meat for better browning.

Step-by-Step Instructions

In a small bowl, combine all of the ingredients for the spice rub and mix to combine. Coat the brisket evenly on both sides with about half of the rub.
(Jennifer Segal)
Jennifer Segal

Allow the meat to sit for 10 to 15 minutes to “sweat” and absorb the rub, then coat the meat with the remainder of the rub. It may seem like too much rub but it’s not; use it all.

(Jennifer Segal)
Jennifer Segal

Place the brisket on a rack over a baking sheet and refrigerate, uncovered, for 24 to 36 hours.

(Jennifer Segal)
Jennifer Segal

Preheat your smoker to 225 F. Place the brisket in the smoker, fat side up. If using a meat thermometer with a wired probe (which I highly recommend if you have one), insert it into the thickest part of the meat to monitor the internal temperature continuously. (If you only have an instant-read thermometer, check the temperature periodically by quickly inserting it into the thickest part of the meat, being careful to minimize the time the smoker is open to avoid losing heat and smoke.)

(Jennifer Segal)
Jennifer Segal

Smoke for 6 to 8 hours, or until the internal temperature is 165 F to 170 F, and the bark is a nice mahogany color.

(Jennifer Segal)
Jennifer Segal

Cut 2 sheets of butcher paper or aluminum foil, each about 3 feet long, and overlap them on a large work surface. Using heat proof gloves or oven mitts, remove the brisket from the smoker and place it lengthwise on the papers, fat side down, then wrap it in butcher paper or aluminum foil. Return to the smoker, seam side down. Wrapping the brisket, a technique known as the “Texas crutch,” speeds up the cooking process by preventing what’s called “the stall,” when evaporation from the surface of the brisket halts the cooking process. Wrapping also helps lock in moisture that would otherwise be lost as the brisket cooks.

(Jennifer Segal)
Jennifer Segal

If using a remote probe thermometer, place it back in (through the paper) and continue cooking until the internal temperature reaches 203 F, 4 to 6 hours more. The cook time will vary with each piece of meat; the brisket is done when it reaches the proper temperature and the thermometer probe slides in and out of the meat with little resistance, like soft butter. Place the wrapped brisket in an insulated cooler to rest for 1 to 3 hours.

To serve the brisket, unwrap it over a sheet pan to catch any juices (you’ll want those for serving). Transfer the brisket to a large cutting board (preferably one with a well for collecting juices), lean side down. Using a sharp carving knife or an electric carving knife, slice the meat against the grain.

(Jennifer Segal)
Jennifer Segal
Note that the grain in the flat-cut portion of the brisket runs perpendicular to the grain in the point-cut portion. So, start by slicing the flat cut 1/4-inch thick. When the slices start to show a line of fat running through the middle, you have reached the point cut, so rotate your slicing angle 90 degrees and cut the point into slightly thicker slices, cutting away any excess fat as you go. Arrange the slices on a platter or plates and spoon the reserved meat drippings over them. Serve BBQ sauce and any fixins’, like pickled red onions, cornbread, potato salad, and coleslaw, on the side.

Smoked Brisket

Serves 12 to 16

Prep Time: 20 Minutes

Cook Time: 14 Hours

Total Time: 14 Hours 20 Minutes, plus at least 24 hours to season/rest the meat
  • One 12 to 14 pounds whole packer brisket, trimmed with a 1/4-inch fat cap (see note)
  • 1/4 cup table salt
  • 1 1/2 tablespoons fresh ground black pepper
  • 1 1/2 tablespoons smoked paprika
  • 1 1/2 tablespoons garlic powder
  • 1 1/2 tablespoons onion powder
  • 1 1/2 tablespoons instant espresso powder (optional)
  • 2 teaspoons dry mustard
  • 1 teaspoon cayenne pepper
Special Equipment
  • Smoker
  • Digital meat thermometer
  • Pink butcher paper or heavy-duty aluminum foil
Trim any excess fat off of the brisket, if necessary. If you’re not sure how to go about it, this is a good tutorial.

In a small bowl, mix the salt, black pepper, smoked paprika, garlic powder, onion powder, dry mustard, espresso powder (if using), and cayenne pepper. Coat the brisket evenly on both sides with about half of the spice rub. Allow the meat to sit for 10 to 15 minutes to “sweat” and absorb the rub, then coat the meat with the remainder of the rub. It may seem like too much rub but it’s not; use it all. Place the brisket on a rack over a baking sheet and refrigerate, uncovered, for 24 to 36 hours.

Preheat your smoker to 225 F.

Place the brisket in the smoker, fat side up. If using a digital meat thermometer with a wired probe (which I highly recommend if you have one), insert it into the thickest part of the meat to monitor the internal temperature continuously. (If you only have an instant-read thermometer, check the temperature periodically by quickly inserting it into the thickest part of the meat, being careful to minimize the time the smoker is open to avoid losing heat and smoke.) Smoke for 6 to 8 hours, or until the internal temperature is 165 F to 170 F, and the bark is a nice mahogany color.

Cut 2 sheets of butcher paper or aluminum foil, each about 3 feet long, and overlap them on a large work surface. Using heat-proof gloves or oven mitts, remove the brisket from the smoker and place it lengthwise on the papers/foil, fat side down, about 1 foot from the bottom edge. Fold the bottom edge over the brisket and pull it tightly. Fold in the sides snugly, then continue rolling the brisket, keeping the wrap tight. Make sure the brisket is fully enclosed. Return it to the smoker, seam side down (it doesn’t matter if the fat side is up or down at this point). If using a thermometer with a wired probe, place it back in through the paper/foil. Continue cooking until the internal temperature reaches 203 F, 4 to 6 hours more. The cooking time will vary with each piece of meat; the brisket is done when it reaches the proper temperature and the thermometer probe slides in and out of the meat with little resistance, like soft butter.

Place the wrapped brisket in an insulated cooler to rest for 1 to 3 hours, allowing the meat to relax and the juices to redistribute. To serve the brisket, unwrap it over a sheet pan to catch any juices (you'll want those for serving). Transfer the brisket, lean side down, to a cutting board (preferably one with a well for collecting juices). Using a sharp carving knife or an electric carving knife, slice the meat against the grain. Note that the grain in the flat-cut portion of the brisket runs perpendicular to the grain in the point-cut portion. So, start by slicing the flat cut 1/4-inch thick. When the slices start to show a line of fat running through the middle, you have reached the point cut, so rotate your slicing angle 90 degrees and cut the point into slightly thicker slices, cutting away any excess fat as you go. Arrange the slices on a platter or plates and spoon the reserved meat drippings over them. Serve barbecue sauce and other fixins’ on the side.

Note: Before cooking, take note of the direction of the muscle fibers in the flat cut, and make a cut in one of the corners to indicate which way to cut against the grain once the brisket is cooked (it’s hard to see once the bark is there).

Nutrition Information

Per serving (16 servings)

Calories: 1,105, Fat: 88 g, Saturated fat: 36 g, Sugar: 0 g, Fiber: 1 g, Protein: 71 g, Sodium: 930 mg, Cholesterol: 373 mg

Nutritional Data Disclaimer
This article was originally published on OnceUponaChef.comFollow on Instagram
Dear Readers: We would love to hear from you. What topics would you like to read about? Please send your feedback and tips to [email protected].
Jennifer Segal
Jennifer Segal
Author
Jennifer is a classically trained chef, Cookbook author, and busy mom. She became interested in cooking in college while studying abroad in France and living with a French family. She is a graduate of L’Academie de Cuisine. Visit OnceUponaChef.com.
Author’s Selected Articles
Related Topics