If you’re headed to the grocery store for your fall or holiday baking, you’re in for a shock: Butter prices have nearly doubled over the past year.
This increased cost is compounded by shorter operating hours and fewer people working in processing facilities. As a result, the cost of butter has risen more than other staples, and supplies remain short.
But don’t be overly alarmed by this threat to your kitchen endeavors; a resourceful baker can ride out the spiking inflation with relative ease by taking some tips from Americans who experienced these challenges before us.
This isn’t the only time American families have faced high costs and short supplies. Both World War I and II saw extremely short supplies of kitchen staples such as meat, wheat flour, and sugar. Dairy was in particularly low supply during World War II. Accordingly, butter, cheese, and canned milk were strictly rationed.
American women on the homefront faced the challenge of feeding families with limited, and sometimes unreliable, supplies. They learned to make do with very little and still put wholesome meals, and the occasional treat, on the table. While memory fades a little each generation, there are a few ingenious workarounds that can help save your grocery budget and your holiday baking, too.
Alternative Fats
Some of the tips from World War II-era cookbooks seem a little cumbersome, such as softening gelatin into a little milk and whipping it into butter to extend it, while others are easy and practical switches that’ll work for even a modern cook who is pressed for time. Both margarine and shortening saw increased popularity during this time, but rising concern about the healthfulness of hydrogenated fats means that these options are best left off the table.One of the most popular methods of extending groceries was to save meat drippings. While this practice was largely discarded during the low-fat craze of the 1980s and 1990s, many of us still remember a coffee can on the kitchen counter filled with bacon fat. In addition to bacon fat, you can also save sausage drippings or the fat rendered from roasting a chicken or a joint of meat. Drippings are particularly delicious when used to roast or sauté vegetables, or worked into mashed potatoes. Store any rendered drippings in the fridge for up to five days for best flavor.
The popular wartime cooking booklet “Your Share,” which was published by Betty Crocker in 1943, recommends using poultry fat (also known as schmaltz), lard, and bacon fat in pastries. It may seem odd to swap bacon fat for butter in your favorite chocolate chip cookie recipe, but you might find it works well. The booklet cautions that while poultry fat can make a delicious cake, it may not rise quite as high, and that bacon fat works particularly well in baked goods flavored with chocolate or spices. While it’s well-known that lard makes a good pie crust, you can also use it in place of butter in cookies and other pastries.
Working with alternative fats means making other adjustments to your recipes, too. Butter is only about 80 to 85 percent fat. The remaining 15 to 20 percent consists of water and various milk solids held in suspension. Butter is, in effect, a water-in-oil emulsion similar to mayonnaise in its composition.
Creative Cakes
In addition to using drippings, lard, and poultry fat as alternatives to butter, you might try making a few of the more resourceful recipes from this era. Many homemakers simply learned to make do without and developed some truly inventive cakes and pastries.Crazy cake is a chocolate cake made without butter, eggs, or milk. The aptly named Wartime Cake swapped butter for a combination of lard and dried fruit and skipped the milk and eggs entirely. Other options included fruit bars made with dried fruit and the naturally butterless Angel Food Cake.
Wartime Cake
Wartime cake is a mildly sweet spice cake made without butter, eggs, or milk. Instead, lard, brown sugar, and raisins give the cake a richly moist quality and incredibly delicious flavor. This recipe is adapted from the 1943 publication of “Your Share” by Betty Crocker.- 2 cups all-purpose flour
- 1 teaspoon salt
- 1 teaspoon baking soda
- 1 teaspoon baking powder
- 1 cup brown sugar
- 1 1/4 cups water
- 1/3 cup lard
- 2 cups raisins
- 2 teaspoons cinnamon
- 1/2 teaspoon nutmeg
- 1/4 teaspoon cloves
Dump the flour in a medium mixing bowl, then whisk in the salt, baking soda, and baking powder. Set the bowl aside while you prepare the other ingredients.
Add the brown sugar, water, lard, raisins, cinnamon, nutmeg, and cloves to a saucepan. Bring the contents of the pan to a boil over medium-high heat, whisking as necessary, and continue boiling for 3 minutes. Turn off the heat and allow the mixture to cool to room temperature.
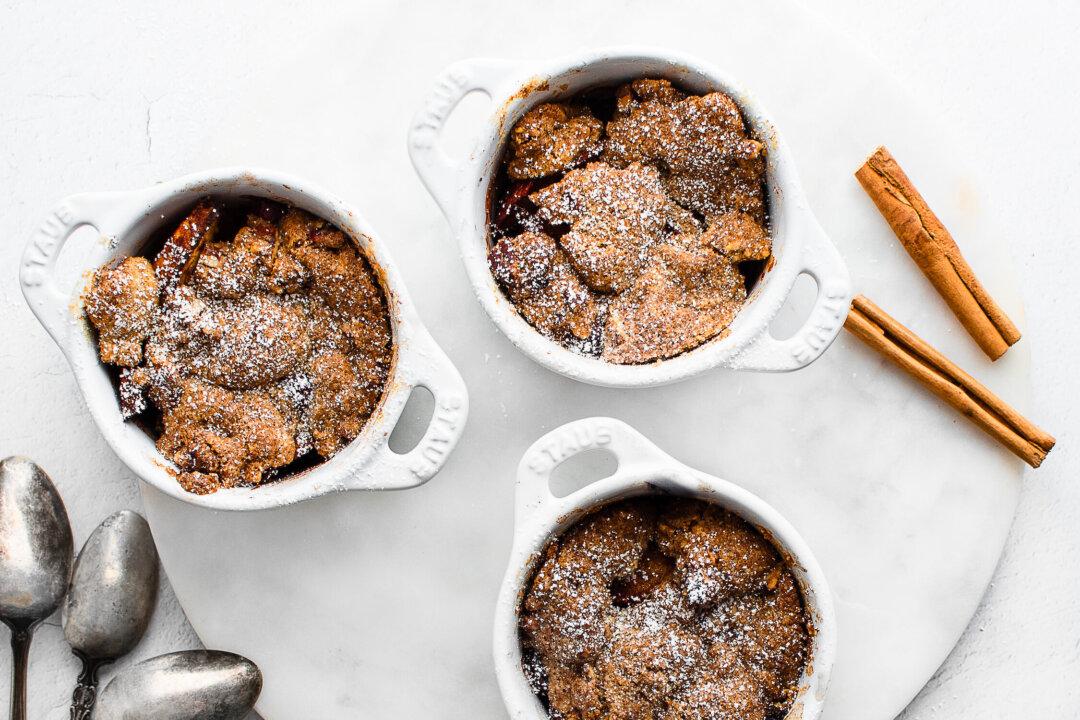
Brandied Apple-Cranberry Crumble
Bacon’s smoky, salty qualities are a natural match for apples’ sweetness and cranberries’ tart acidic notes. Bacon fat provides the foundation for the crumble, giving it a pleasant savory, salty quality. Gravenstein apples are my favorite in this recipe for their tart flavor and ability to stand up well to cooking, but Granny Smith apples work well in this recipe, too.- 4 pounds apples, peeled, cored, and cut into 1/2-inch thick slices
- 1 cup fresh or frozen cranberries
- 2 tablespoons packed dark brown sugar
- 2 tablespoons brandy
- 2 teaspoons apple cider vinegar
- 1/2 teaspoon salt
- 1 teaspoon cinnamon
- 1 cup all-purpose flour
- 1/3 cup packed dark brown sugar
- 1/4 teaspoon salt
- 1/2 cup chopped pecans
- 1/4 cup bacon fat, melted
To prepare the filling, combine the apples, cranberries, brown sugar, brandy, vinegar, salt, and cinnamon in a large bowl. Mix together until the cranberries and apples are lightly coated with the sugar and cinnamon. Transfer to one 9- by 13-inch baking dish or to individual dishes, and then bake for about 35 minutes or until apples are softened and the liquid syrupy.
While the apples bake, prepare the crumble topping. Dump the flour, sugar, salt, and pecans into a bowl and stir to combine. Pour in the bacon fat and then stir until clumps form and no dry flour remains.
After the apples have baked for 35 minutes, remove the pan from the oven and then sprinkle the crumble evenly over them. Return the pan to the oven and continue baking a further 15 to 20 minutes longer, or until the filling is cooked through and the top is evenly browned. Allow the crumble to cool to room temperature before serving. Store any leftovers in the fridge for up to 5 days.
==========