Gel Test: How to Know When Your Homemade Jam Is Ready

Gel Test: How to Know When Your Homemade Jam Is Ready
Gel test your jam frequently until it reaches the perfect consistency. Erin Scott
Updated:
I recommend that you test your jam frequently throughout the cooking process, especially if you’re new to jamming. It can’t hurt to test it as soon as it comes to a boil so you can really see what stage the preserve is in.
You’re trying to get a sample of your boiling hot jam and cool it down to room temperature as quickly as possible so you can see how thick it really is. No matter how thick it is, it will always look very liquid when hot (basic school chemistry). 
A lot of recipes say to turn off the heat under your jam while your gel test is cooling down, but that’s only if you really think the jam is ready. We test our batches more often than just when we think the jam is ready, so we don’t shut off the heat until we really think the moment has arrived.
We like to start testing jam after it has been boiling for about 10 minutes. This is because the pectin and the sugars in the fruit vary, and thus the cooking time varies. When you’re making a low-sugar jam with no added pectin, like we do in the recipes in this book, you’re really relying on the pectin in the fruit to greatly contribute to the gelling process. The cooking time can vary from 15 minutes to 40 minutes. It is not optimal for a jam to cook longer than 40 minutes because the flavor and the color become compromised, and we’re going for top rate! 
Your jam will travel through several stages while it cooks, from watery, to syrupy like maple syrup, then to a thicker sauce, and finally the fruits and the juices merge together to the different stages of jam: a loose jam, medium jam, and then a firm jam. When you don’t add any extra pectin, it’s very hard to overcook your jam and easy to undercook it.

How to Test Your Preserve

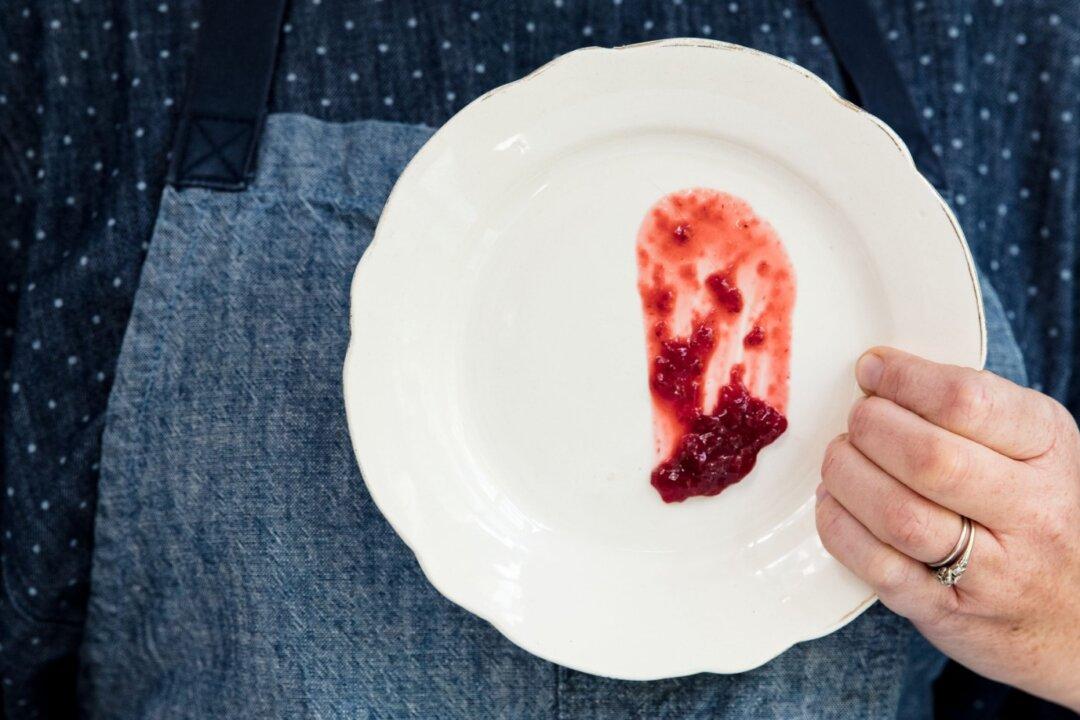
To test your preserve, take a one-teaspoon dollop, put it on the middle of one of your five chilled plates, and return it to the freezer. Make sure the plate is sitting evenly. Leave it in there for about 4 minutes until it is completely cooled. You have to be patient at this moment and really wait for it to cool. You know it’s ready when you take the plate out of the freezer and don’t feel any warmth on the bottom of the plate. (Taking the test dollop out while it’s still warm is a common temptation for the students in my workshops.) When the test is cooled to room temperature, flip the plate vertically and watch the jam descend. 

The Different Stages

In the first liquid stages, the juice will simply flow down the plate in a narrow, straight line very quickly. 
As the jam cooks and thickens, this drip becomes more conical in shape. If your test has a conical shape at all, then it has not yet gelled properly. Keep cooking! When it’s closer to being done, it all comes down the plate horizontally together; this is called sheeting, and it’s the first sign of the loose jam stage. 
If you would like your jam thicker, just keep cooking it for a few more minutes. As it thickens, it comes down the plate at a slower speed, and as it becomes a very thick jam, it hardly moves down the plate and sort of just sticks to the plate. I prefer to stop cooking my jam before it gets to this stage. 
Note: Many new jam makers stop cooking their jam too soon and end up with syrup. 

The Magic Moment

Gel set is that magic moment you’ve been waiting for. It’s when your fruit becomes jam! That delectably spreadable, delicious fruit preserve with summer’s sun woven into it. Yum!
So how do you know when it’s jam? Jam has about a 10-minute window of what can be considered done. It’s much more forgiving than a jelly or marmalade, since those have only about a 3-minute window of doneness. Jam can range from a looser gel set that’s spreadable, but may really soak into the bread and be too juicy, to a thick jam that starts to taste slightly overcooked but is still delicious. I like to aim for the middle of that range, especially when entering jam in the county fair. You’ve overcooked your jam when it’s very thick and the sugars start to taste caramelized. 
Note: The jams continue to set up over the next 24 hours in the jars, so don’t think this is the final consistency. It is just a visual that will help you discover when the jam is done. 
Excerpted from “It Starts with Fruit” by Jordan Champagne, with permission by Chronicle Books, 2020.
Jordan Champagne
Jordan Champagne
Author
Related Topics