Why Butchers Swear by This Steak Cut

For the price, hanger steak is one of the most tender, flavorful steaks you can buy.
Why Butchers Swear by This Steak Cut
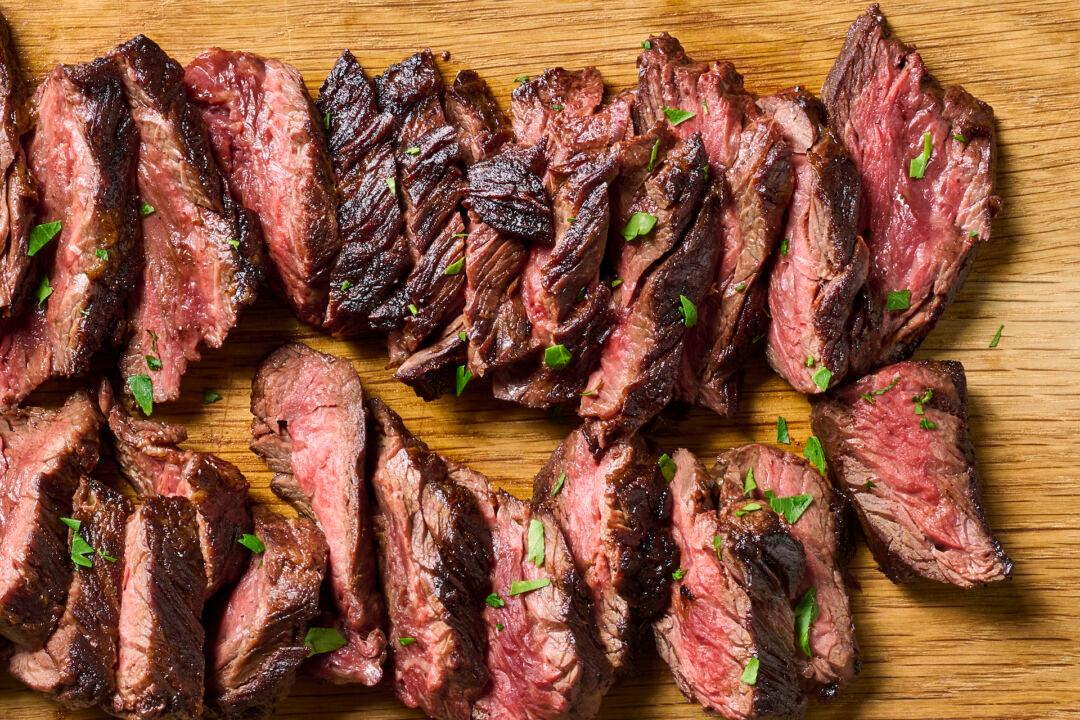
Hanger steaks require just a little bit of extra work for a whole lot of tender flavor. Alex Lepe/TCA
Updated:
0:00

If I want to know the best vegetables to buy at the farmers market (and I do, desperately!), I’m going to ask a farmer. But if I want to know what cut of steak I’m sleeping on, I’m asking my butcher.

Hanger steak, also known as butcher’s steak, used to be a sort of industry secret. The cut comes from the plate primal, which is the part of the cow directly below the ribs. The name “butcher’s steak” came about because there is only one hanger steak per cow, and butchers often kept it for themselves. This is because while it’s extremely tender (hanger is also referred to as “hanging tenderloin!”), there is an inedible center seam that prevents the steak from being served whole. All this to say, it’s not the cutest steak before you slice it.
Once you trim that center seam (which, by the way, is pretty easy!), the steak is easy to cook and a delight to eat. The flavor and texture is very similar to the more-common flank steak, but hanger is more tender. While hanger is much more widely available now than it used to be, it’s still a great value for quality if you’re willing to put in just a teeny bit of trimming effort. If you have some extra time, a simple marinade will only further elevate the flavor.

Why You’ll Love It

  • An affordable cut. For the price, hanger steak is one of the most tender, flavorful steaks you can buy.
  • The steak is delicious, with or without a marinade. And if you want to take your dinner to the next level, just set aside an hour for marinating the steak in a simple mix of citrus juice, olive oil, and garlic.

Key Ingredients for Cooking Hanger Steak

  • Hanger steak: Resembling flank steak in flavor and texture, you’ll know it’s hanger steak by the signature “seam” membrane running lengthwise through the center.
  • Salt: Season the outside of the steak generously with kosher salt because you can’t season the inside!
  • Oil: Use an oil with a higher smoke point like grapeseed or vegetable oil to get the best sear.
  • Marinade: If you have the time, a marinade of lemon or lime juice, olive oil, and garlic will add an extra layer of flavor.

What to Serve With Hanger Steak

Hanger Steak

Serves 4
  • 1 (1- to 1 1/2-pound) hanger steak
  • 1 teaspoon kosher salt
  • 1 tablespoon neutral oil, such as grapeseed, safflower, or canola
  • For the optional marinade:
  • 2 tablespoons lemon juice, lime juice, or apple cider vinegar
  • 2 tablespoons olive oil
  • 3 cloves garlic, finely grated or pressed in a garlic press
1. Cut the center seam from 1 (1- to 1 1/2-pound) hanger steak, leaving you with two long pieces of steak. Halve each piece crosswise to create four pieces. Season all over with 1 teaspoon kosher salt.

2. If marinating, place the steaks in a shallow dish, such as a 9-by-13-inch baking dish. Whisk 2 tablespoons lemon juice, 2 tablespoons olive oil, and 3 grated garlic cloves together in a small bowl. Pour over the steak and rub the marinade into the steaks. Flip the steaks once or twice in the dish to coat. Cover the baking dish and marinate for 1 hour at room temperature or up to 24 hours in the refrigerator (remove from the fridge 30 minutes before cooking). Flip the steaks occasionally if you happen to think about it.

3. Remove the steaks from the marinade and shake off any excess marinade. Pat dry with paper towels.

4. Heat a large cast iron skillet over medium-high heat until it starts slightly smoking. Add 1 tablespoon neutral oil, then add the steaks. Cook until deeply browned on the bottom, 4 to 5 minutes. Flip the steaks and cook until medium-rare (between 125 degrees F and 130 degrees F), 4 to 5 minutes more. Begin checking the internal temperature of the steaks at 6 minutes total cook time for your preferred doneness. For thicker pieces, flip onto their sides for about 1 minute to sear all over and cook more evenly.

5. Transfer to a clean cutting board or plate and let rest for 10 minutes before serving.

Recipe note: Leftovers can be refrigerated in an airtight container for up to four days.

Dear Readers: We would love to hear from you. What topics would you like to read about? Please send your feedback and tips to [email protected].
Rachel Perlmutter, TheKitchn.com
Author
Rachel Perlmutter is a culinary producer for TheKitchn.com, a nationally known blog for people who love food and home cooking. Submit any comments or questions to [email protected]. Copyright 2024 Apartment Therapy. Distributed by Tribune Content Agency, LLC.