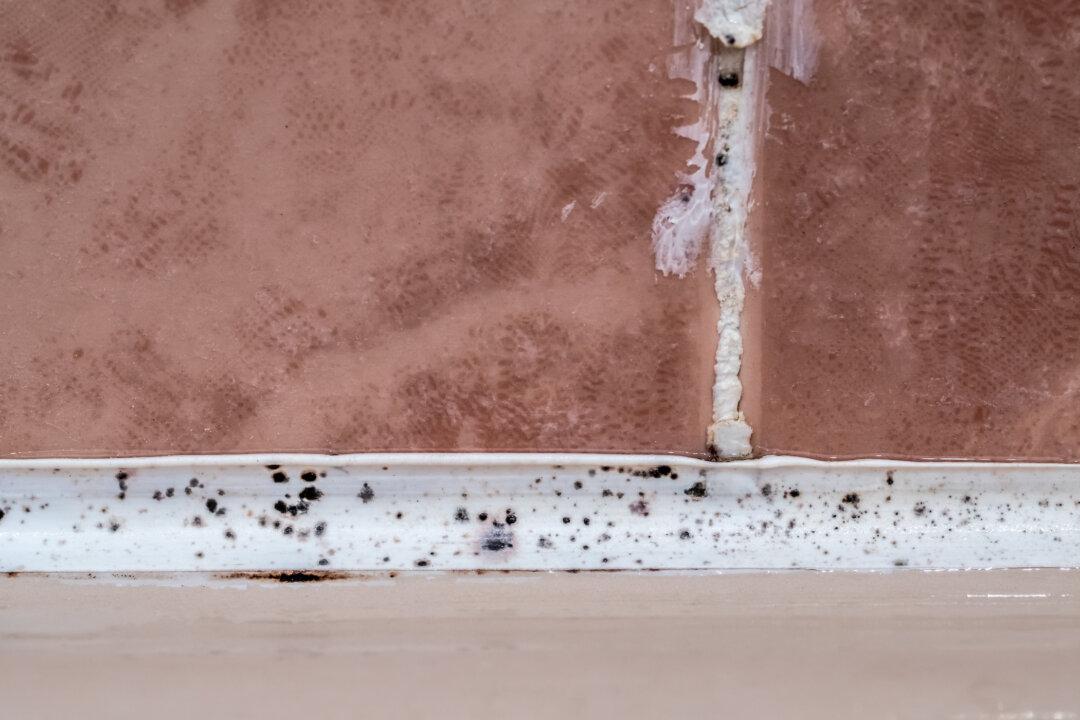
Dear James: As hard as I try to keep it clean, there continues to be some dark mildew on the bathroom caulk. Should I just remove the old caulk and redo it?—Nick H.
Dear Nick: You can continue to try to clean it and make sure to dry it off after every shower or use of the sink. Your best option though is to remove the old caulk and recaulk it. Use new caulking that is labeled as mildew resistant.
Caulk joints in bathrooms, particularly around bathtubs, is an ideal location for mildew. Caulk is actually porous and stays damp for a long time after bathing or showering. Soap, shampoo, body oils, etc. are all excellent nourishment for the mildew spores to thrive and reproduce.
Here are a few tips to reduce the growth of dark mildew. When you are done bathing, rinse off the walls and caulk with water to minimize soap and oil residues. Leave the shower doors or curtain open after bathing so that it dries faster. Run the bathroom vent fan for about five minutes too.
There are new bathtub caulks that are truly mildew-proof with lifetime guarantees against mildew growth. All bathtub caulks, even the cheaper ones, have some mildewcides in them, but the more expensive caulks have much more of these chemicals.
Each time water comes in contact with the caulk, a slight bit of these chemical leach out to block any mildew growth. Obviously, a caulk with a higher concentration of these chemicals stays mildew free for a longer time. Check the label on the tube of caulk for the word mildew-proof, not just resistant.
The difficulty in removing the old caulk depends much on the type of caulk that was used. No matter what type of caulk it is (non-acrylic water-based, acrylic water-based, or silicone), first scrape out as much of the old caulk as possible. Don’t try to remove it all by scraping or you will surely scratch the surfaces.
Wear heavy work gloves and plan on taking your time for this job. Use a utility knife or a strong scraper. If you try to rush, you will either end up cutting yourself or slipping and scratching the tile, bathtub or plumbing fixtures.
If the old caulk is non-acrylic, laying a wet rag on it for several days will make the material swell and allow you to peel most of it off. If it is acrylic caulk, 90 percent isopropyl alcohol (works better than rubbing alcohol) should make it lift off the tub and tile.
Silicone caulk is the most difficult to remove because it is resistant to most solvents. Some strong alkaline chemicals may weaken the old silicone. Follow the manufacturer’s usage and safety instructions carefully. 3M Co. makes a silicone caulk remover that may also help.
Now you are ready to begin to apply the new high-quality caulk. Cut the tip of the tube of caulk at an angle and size the opening to the width of area you want to fill. Start with a smaller opening and then enlarge it is needed. You cannot shrink one that is too big.
If you are using acrylic water-based caulk, you will need a bucket of clean water to clean and smooth the caulk bead. If you are using silicone, you will need lacquer thinner. Lacquer thinner is extremely flammable, so do not smoke and open a window. Apply the caulk slowly and only about two feet at a time. Use your finger to smooth the bead. Wipe the excess off of the tile and tub with a wet sponge (water-based caulks) or a rag with lacquer thinner (silicon caulks).