In the world of cakes, red velvet demands your attention. Special occasions call for cake, but red velvet is the special occasion. There’s something so celebratory about it.
Cheesecake has a similar status—it’s not an everyday bake, and the thought of it suggests a bit of indulgence. Combining the two gives you a stunning dessert that is a little over-the-top in the best way.
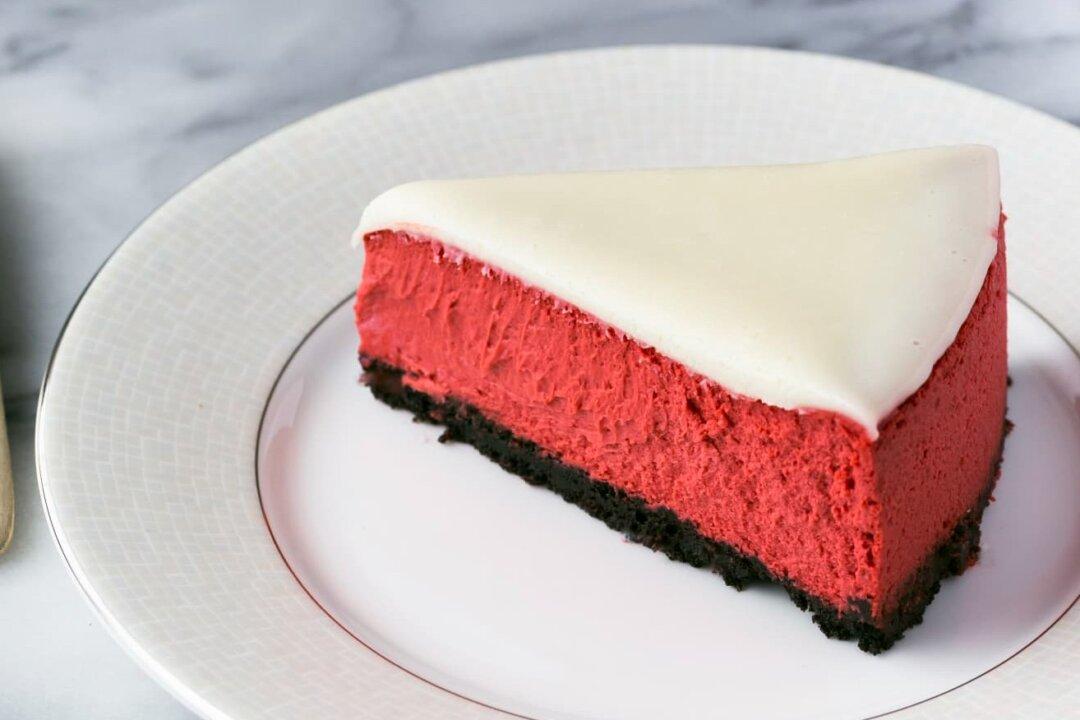
Red velvet cheesecake is a play on the traditional layer cake. A red velvet cake is a fluffy, cocoa-scented cake that’s layered with a cream cheese or boiled milk buttercream. For this cheesecake version, I filled a chocolate cookie crust with a buttermilk-spiked and cocoa-scented cheesecake filling.
How Do I Bake a Creamy, Crack-free Cheesecake?
Because this is a red velvet cheesecake, I really wanted a smooth, velvety texture. My first version I mixed up was full of air, but switching to a food processor changed this drastically. Once I had the texture figured out, I needed to think about cracking. Cracks in cheesecake are common, and occur from either over-baking or trying to rush the cooling after the cheesecake is baked. For the best texture, I found the following tips to be helpful:Use a food processor to mix the base. A stand mixer or hand beaters work fine, but a food processor mixes things up without incorporating a lot of extra air.
Tap out extra air bubbles. By gently dropping the pan on the counter before baking, air bubbles rise up to the top instead of staying trapped within.
Bake at 250 degrees F. This lower temperature helps avoid a raised edge and sunken middle, and provides a consistent texture from edge to edge.
Turn off the oven when the center of the cheesecake is between 145 and 150 degrees F. It’s difficult to tell when a cheesecake is done based solely on looks. It won’t look set in the middle, and a toothpick won’t come out clean. A thermometer is your best bet to make sure it’s fully cooked but not over-baked.
Let the cheesecake rest in the turned-off and cracked oven. Once the cheesecake hits 145 to 150 degrees F, turn off the oven, crack the door open, and let it rest for 1 hour.
Let the cheesecake rest at room temperature. After the initial rest, remove the cheesecake to a wire rack. Run a paring knife around the edge and let it cool at room temperature for an additional two hours.
Can I Make Cheesecake Ahead of Time?
Cheesecake should not be eaten before fully chilling, meaning it’s the perfect dessert to make ahead because it almost requires it. Making cheesecake isn’t hard, but does require patience once it’s in the oven. The low baking temperature and intentional cooling take several hours. But once the cheesecake is in the refrigerator, it will patiently wait for you for up to three days.Red Velvet Cheesecake
Serves 12 to 16- 2 pounds (4 blocks) full-fat cream cheese
- 4 large eggs
- 1/2 cup buttermilk, any fat content
- 1/2 cup heavy cream
- 6 ounces chocolate wafer cookies (26 to 30 cookies)
- 1 cup plus 1 tablespoon granulated sugar, divided
- 1/2 teaspoon kosher salt, divided
- 5 tablespoons unsalted butter, plus more for pan
- 2 tablespoons natural unsweetened cocoa powder
- 1 tablespoon plus 1 teaspoon liquid red food coloring
- 1 teaspoon vanilla extract
- 4 ounces good white chocolate (not candy coating), chopped
- 1/4 cup heavy cream
- Tiny pinch of kosher salt
Arrange a rack in the middle of the oven and heat the oven to 350 degrees F. Place a sheet of parchment on the removable bottom of a 9-inch springform pan. Replace the ring and secure it to the base. The overhang will help you remove the cake from the base once baked. Rub a small pat of butter on the bottom of the lined pan and around the interior of the ring.
Place the butter in a small bowl and microwave until melted, about 40 seconds (alternatively, melt on the stovetop). Pour into the food processor and process until the cookies are finely crushed, about 5 seconds. Transfer to the springform pan and use your hands or the bottom of a glass to press them evenly into the bottom. Press firmly but don’t pack it in too much or it will be difficult to cut when finished.
Bake for 10 to 12 minutes. There won’t be much visual change, but it should smell of toasty chocolate. Set aside to cool while you make the filling.
Add the cream cheese, eggs, buttermilk, cream, remaining 1 cup granulated sugar, remaining 1/4 teaspoon kosher salt, natural cocoa powder, red food coloring, and vanilla extract to the food processor fitted with the blade attachment. Process for 10 seconds. Stop the motor and scrape down the sides of the bowl with a flexible spatula. Repeat processing and scraping two more times, or until the batter is fully incorporated with no visible bits of cream cheese.
Pour into the prepared crust. Pick the pan up about 1 inch off of the counter and drop it carefully and evenly on the counter, repeating a few times to release any air bubbles.
Bake until the edges are firm and the center jiggles slightly and reaches 145 to 150 degrees F, 1 hour and 25 minutes to 1 hour 35 minutes. Turn off the oven and keep the oven door open a crack or prop it open with the wooden spoon. Let the cheesecake gently cool in the oven for 1 hour.
Place cheesecake on a wire rack. Run a paring knife around the edge of the pan and let cool to room temperature, about 2 hours more.
Pour the glaze over the top of the cheesecake, then use an offset spatula to spread it to the edges, trying not to let it go over the edges for the cleanest presentation. Pop any large air bubbles with the tip of a paring knife.
Cover the pan with aluminum foil or a plate. Refrigerate until completely chilled, at least 4 hours but preferably overnight. To serve, run a paring knife along the inside of the pan. Unlock and remove the outer ring. Hold one of the corners of parchment down, slide a large offset spatula underneath the cheesecake, and transfer to a cutting board or serving platter. Cut into slices and serve.