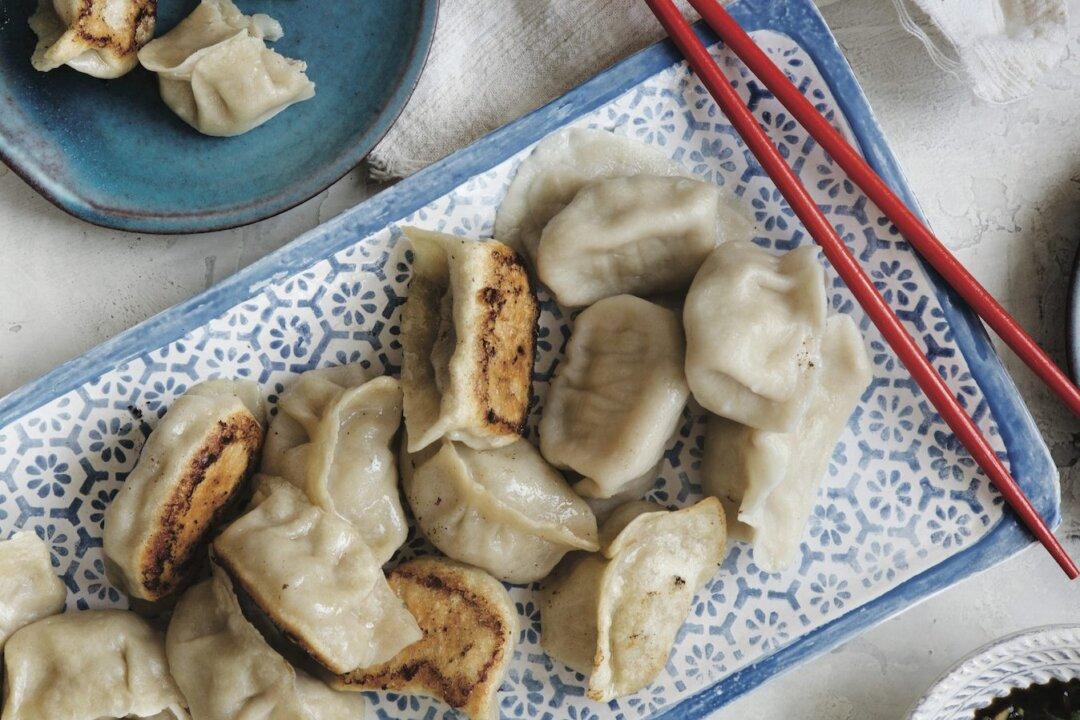
Pork and Chinese Cabbage Dumplings
Pork and Chinese cabbage make the classic dumpling filling. I recommend using the best ground pork you can find. I buy ground Kurobuta pork. Kurobuta is the Japanese name for the Berkshire breed of pig. It’s a high-quality pork that has plenty of marbling, which gives the filling great flavor. You can also buy ground pork from your favorite local farmer. If you have access only to what is available at your nearest supermarket, it’s totally fine. This recipe will work. What I suggest is to buy unseasoned bulk sausage instead of the regular ground pork, which tends to be too lean, making the flavor flat after it’s cooked. The other option, if you have a meat grinder, is to grind some pork butt for the filling. Chinese cabbage, also called napa cabbage, is widely available. The filling can be made up to a day ahead.- 1 batch dumpling dough (recipe follows) or store-bought dumpling wrappers
- Soy-Ginger Dipping Sauce (recipe follows), for serving
- 1 pound ground pork
- 2 1/2 cups loosely packed, finely chopped Chinese cabbage
- 2 tablespoons soy sauce
- 1 stalk green onion, finely chopped
- 1 teaspoon minced ginger
- 1 teaspoon sesame oil
- 1/4 teaspoon white pepper powder
To make the filling, in a medium bowl, combine the pork, cabbage, soy sauce, onion, ginger, oil, and pepper, and mix well. Set the filling aside.
Fill the wrappers with the prepared filling (about 1 heaping teaspoon each).
Boil, steam, or panfry the dumplings, and serve with the dipping sauce.
The simplest way to seal a dumpling is to fold the wrapper over the filling into a half-moon shape. Match the edges together and press as if you were sealing an envelope. There is no need to dab homemade wrappers with water. There is enough moisture in the dough that the edges will seal when pressed. Holding the sealed edge of the dumpling between your fingers, set it on its spine and gently wiggle it as you are pushing down so that the dumpling will stand up. Place the completed dumpling on a baking sheet dusted with flour or lined with parchment paper. Repeat with the remaining dumplings.
In a large soup pot or stockpot over high heat, bring 4 quarts of water to a boil. Carefully add about half of the prepared dumplings, or only as many as your pot can accommodate without crowding. Return to a boil and then cook the dumplings for 4 1/2 to 5 minutes. If you are cooking frozen dumplings, boil them for 1 to 2 minutes more. Keep an eye on the water as it may bubble over, and adjust the heat as necessary. The dumplings are done when they puff up. Remove the pot from the heat. Using a large slotted spoon or handled strainer, transfer the dumplings to a serving plate.
Preheat an 8- or 9-inch nonstick skillet over medium heat for about 1 minute. (If you have a bigger or smaller skillet, that’s fine. Adjust the oil amount as needed.) Avoid high heat, which can cause the nonstick coating to deteriorate. Add enough vegetable oil to generously coat the entire surface of the pan and create a slight pool of oil (about 1/8 inch deep). This may seem like a lot of oil, but it will help you create that signature crispy pot sticker crust.
Carefully arrange the dumplings in a single layer in the skillet, flat side down. Add 1/2 cup water to the skillet and cover immediately. Cook for 7 to 9 minutes, or until the water has evaporated and the bottoms of the dumplings have reached a golden brown. The cooking time may vary slightly depending on your stove. Frozen dumplings may need 1 minute more to cook. Adjust the heat as needed.
Dumpling Dough
Makes about 1 pound dough (for about 48 dumplings)- 2 1/2 cups unbleached all-purpose flour, plus more for dusting
- 3/4 cup plus 1 tablespoon warm water (about 105 to 110 degrees F)
Dust your work surface with flour. Remove the dough from the bowl and knead for about 2 minutes. It should feel smooth. Cover the dough with a damp towel or plastic wrap and let it rest on the counter for a minimum of 20 minutes. (While it doesn’t need much longer than that, it won’t hurt the dough if it happens to rest longer.)
Alternatively, you can use a stand mixer to form the dough. Add the flour to the bowl of the stand mixer, and add the water gradually while running the dough hook at medium-low speed. Once the dough comes together, knead for about 2 minutes. Cover the dough and let it rest for 20 minutes. (This dough will hold for several hours at room temperature. It will get stickier, so you will have to knead in about 1 to 2 tablespoons of flour to refresh it. It’s best to make this dough the same day you want to use it.)
Once rested, divide the dough in half. On a surface lightly dusted with flour, roll each half into a rope that’s about 3/4 inch in diameter and about 18 inches in length. Using a knife or a bench scraper, cut each rope into pieces that are about 3/4 inch thick. Each piece should weigh about 9 or 10 grams.
Roll each piece of dough into a small ball and then a flatten it between your palms to create a disc that resembles a wafer cookie. Press your thumb gently into the dough to create a small indentation. Position your rolling pin between you and the base of the wafer of dough. Dust lightly with flour as needed. Roll the pin forward across the dough and back. You do not need to lift the rolling pin. Turn the dough 90 degrees and repeat the forward-and-back rolling. Turn the dough 90 degrees again and repeat the rolling. This forms the beginnings of a circle.
Repeat this for the second revolution, but, for subsequent turns, roll the pin only halfway up. For the third revolution, roll the pin only a third of the way up. The idea is to leave the center of the circle just slightly thicker than the outer edges. The wrapper should end up being a circle about 3 1/4 inches in diameter. Don’t worry if the circle isn’t perfect; it only needs to be roundish. If it looks like an oval, then round it out. If it’s lopsided beyond repair, then bunch up the dough into a ball and start again. Unless you have an assembly line of friends or family helping you, roll out about six wrappers at a time. If you roll out too many, they start to stick to each other and the edges will dry out, which makes it harder to seal.
Note: These dimensions are meant as a guideline. You could make these larger, if you’d like. You would end up with fewer dumplings and each would require more filling. The key is to keep the size consistent, so the dumplings cook consistently. I wouldn’t make these smaller, however, because it makes it more challenging to fold the dumplings, especially if you have big hands or you are a beginner.
Soy-Ginger Dipping Sauce
Makes about 1/2 cup- 1/3 cup soy sauce
- 2 tablespoons rice vinegar
- 1 stalk green onion, finely chopped
- 2 large cloves garlic, finely chopped or crushed
- 1 tablespoon chopped fresh cilantro
- 1 teaspoon minced fresh ginger
- 1 teaspoon chili sauce (optional)