Fix Brick Mortar So It Matches Old Mortar

Fix Brick Mortar So It Matches Old Mortar
Matching the appearance of the brand-new mortar with the existing old, weathered mortar takes some trial-and-error tests. Mark van Dam/Shutterstock
Updated:
Dear James: The mortar between the wall bricks is crumbling in spots and looks bad. How can I repair it so that it does not look much different from the existing mortar joints?—Nick R.
Dear Nick: It is not uncommon for the mortar between bricks to deteriorate in spots. It may be spots where the mortar was not mixed properly or where water might collect. If it is really bad, moisture may get inside the wall, but a brick wall will not collapse just from some bad mortar spots.

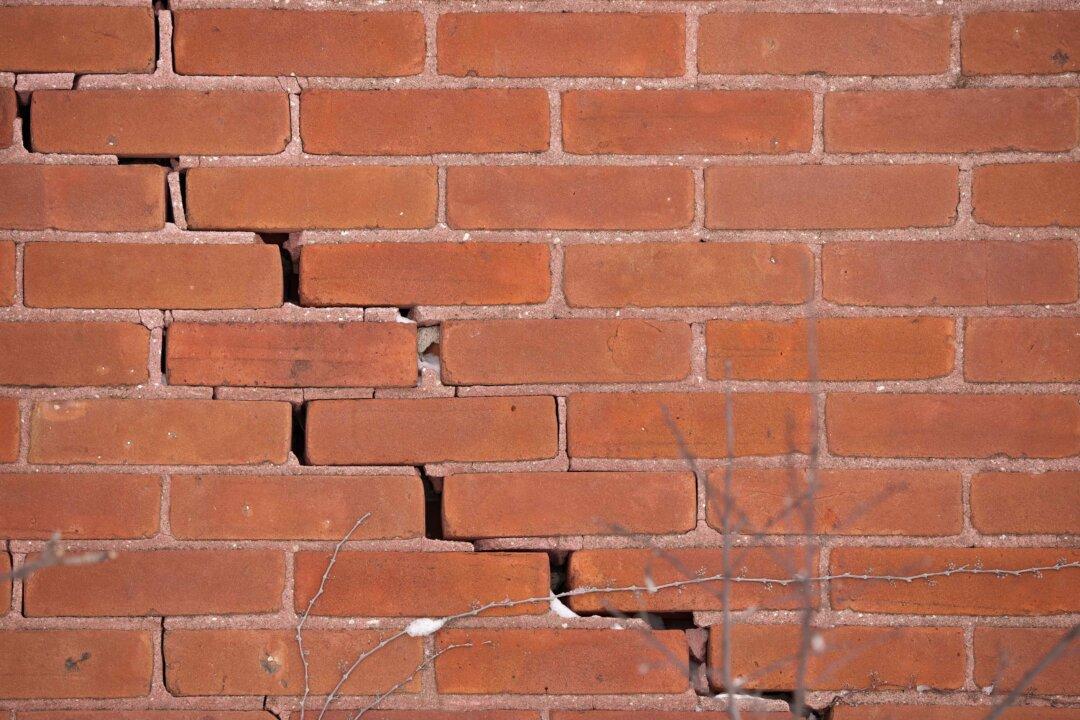
Removing the crumbling mortar and replacing it is a relatively simple but time-consuming project. Matching the appearance of the brand-new mortar with the existing old, weathered mortar takes some trial-and-error tests. You probably will not be able to get a perfect match.

The process of removing the old mortar and replacing it with new mortar is called repointing or tuck-pointing. You do not need the muscles of a 250-pound weightlifter to do this. A two-pound hammer works best, but if you are on the petite side, a one-pound hammer will suffice.

Tuck-pointing is a painstakingly slow, dirty task. You just use a cold chisel and hammer to slowly chip away at the old deteriorating mortar. Now, you get to play doctor. Peck the old mortar away until you reach sound mortar (sort of like how a dentist drills out a cavity).

Go slow, because you do not want to damage the brick. You will be surprised how tightly the mortar will stick to the brick in some areas. Once you have removed all the bad mortar, brush it out with a whisk broom, and hose off any dust. Save several pieces of mortar for a color match.

Mix three parts sand with one part of Type-N masonry cement. Mix in just enough water so that it holds its shape. Now, take an hour break for a cool drink while the mortar stiffens.

You have about 30 minutes to use it before it stiffens too much. Scoop up some mortar on the bottom (yes, bottom) of the trowel, and use a pointing tool to force the mortar into the gap. Once the gap is packed full, roll the jointing tool over it to smooth it out. Brush away any excess mortar.

Now for your second question about matching the new mortar to the old. Since the sand makes up about 75 percent of the mortar, its color has the greatest impact on the appearance of the dried mortar.

It is best if you can find the source of the original sand. This is not as difficult as it might seem. Sand is heavy, and for this reason, the nearest source is usually used. Check with your house builder or others in your area, and they may be able to help you.

If this does not work, you will now get to play detective. Rinse some of the old mortar with muriatic acid. Use a solution of five parts water to one part acid. This will dissolve the old cement and leave just the original sand. This sometimes takes a day or two.

Now, you have a sample of the original sand that you can use to find a match. The two appearance factors are the color and the various sizes of the particles. Rolling the sand in your fingers can give an idea of the particle size. Happy hunting.

If your house is more than 50 years old, the mortar probably had a higher lime content than the high-cement-ratio mortars used today. Add some lime to your mortar mix to more closely match your old mortar. You can buy bags of lime at your building supply outlet.

James Dulley
James Dulley
Author
Send your questions to Here's How, 6906 Royalgreen Dr., Cincinnati, OH 45244, or visit Dulley.com. To find out more about James Dulley and read features by other Creators Syndicate writers and cartoonists, visit the Creators Syndicate website at Creators.com. Copyright 2021 Creators.com
Related Topics