Demolish Plaster Walls

Use the appropriate safety equipment and be mindful of pipes and wires before you start.
Demolish Plaster Walls
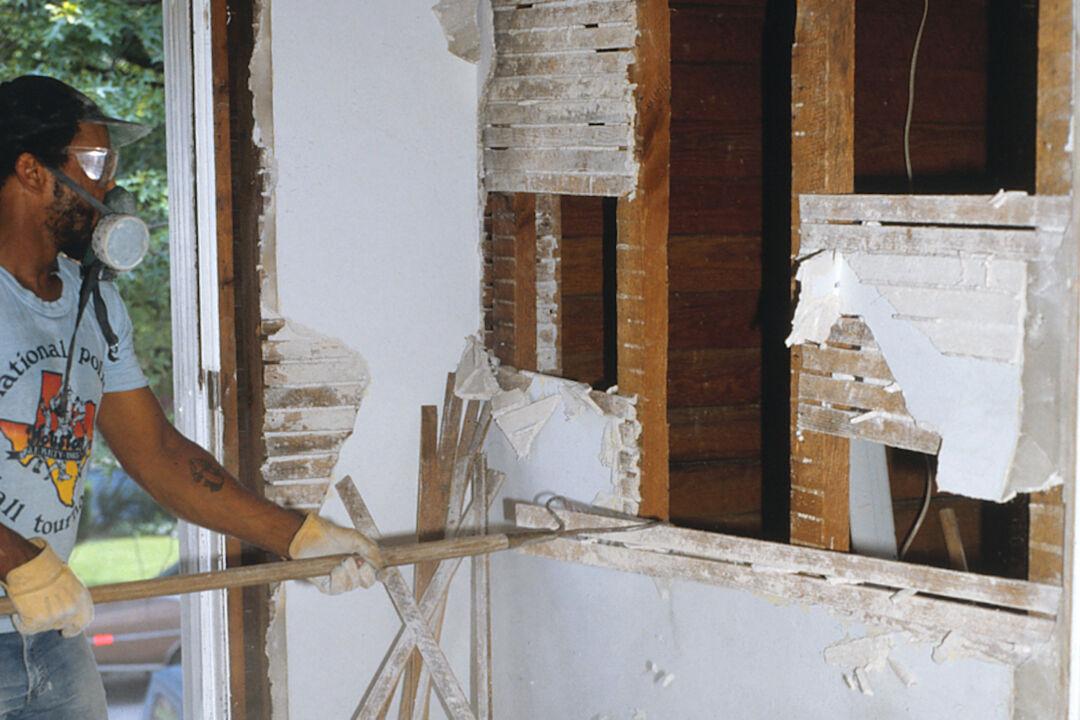
If you're doing the demolition work, protect yourself by wearing a hard hat, eye protection, heavy gloves, boots, and a respirator mask. Gene Hamilton/TCA
Updated:
0:00

Anyone who renovates an older home is faced with knocking down a plaster wall or two. We’ve had our share of plaster dust filling the air; and when the dust settles and the unwanted wall is removed, the opportunity to redesign the space is worth the effort and mess. If you want to save some money and get physical, we suggest doing some of the grunt work yourself. No matter who does the demolition work, it’s a difficult job that creates a nasty cloud of plaster dust and dirt in and around the work zone. So, plan to remove and store furniture and furnishing away from the work zone.

Before you start tearing out a wall, confirm with a building professional that it’s a non-bearing wall and determine the approximate location of plumbing and electrical lines so you avoid damaging them. Remove any doors, woodwork, and trim from around doors and windows, being careful not to damage them if you plan to reuse them.

A contractor will charge $411 to demolish a non-bearing, 10-by-8-foot (80 square feet) plaster wall, but you can do the work for $275, the cost of renting a dumpster and plenty of grunt work. The fee for the roll-off container includes delivery to your work site and removal. But before ordering a dumpster, check with your local building department to see if a permit is required. And it’s a good idea to tell the neighbors and assure them it will be there on a temporary basis. If you have a vehicle that can haul the debris, you might be able to bring it yourself to a local landfill; but find out what the dumping fee is before you decide about doing that phase of the job.

If you’re doing the demolition work, protect yourself by wearing a hard hat, eye protection, heavy gloves, boots, and a respirator mask. Protect the floor with a heavy tarp, and tape heavy plastic drop cloths at doorways to seal the room and keep the spread of plaster dust and dirt to a minimum. Make sure you protect the surrounding woodwork and trim, such as a hall banister. We wrapped thick newspaper and cardboard around a banister, so it was shielded from any blows of plaster debris. We’ve used a sledgehammer to break up the plaster and a pry bar and bow rake to pull it off the lath. If you’re working on a second-floor room, consider jury-rigging a window chute with sheets of plywood to slide the debris outside to the dumpster.

To find more DIY project costs and to post comments and questions, visit www.diyornot.com and m.diyornot.com on smartphones.

Pro Cost—DIY Cost—Pro time—DIY Time—DIY Savings—Percent Saved

$411—$275—15.0—22.5—$136—33 percent

Dear Readers: We would love to hear from you. What topics would you like to read about? Please send your feedback and tips to [email protected].
Gene and Katie Hamilton
Author
©2022 Gene and Katie Hamilton. Distributed by Tribune Content Agency, LLC.
Author’s Selected Articles