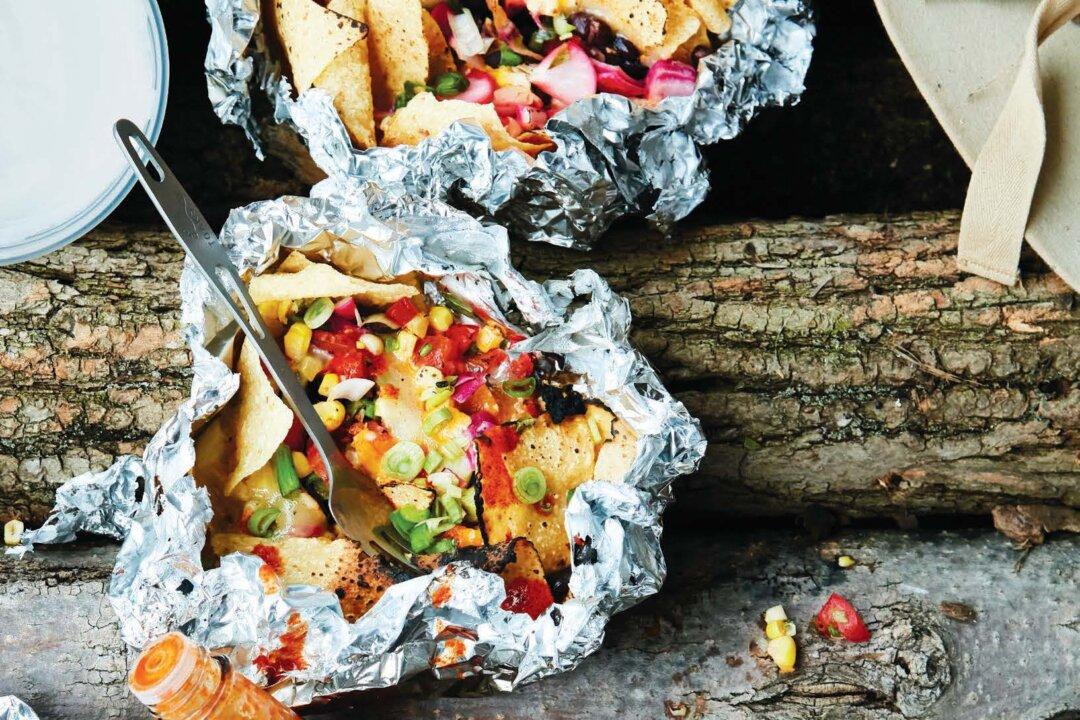
Camp Mess Nachos
It was the first snowmelt of spring when I discovered I was pregnant, and suddenly I was infatuated with melted cheese and pickles. Firelight Camps had just opened for the season, and I realized I was going to have to master campfire nachos to keep my insatiable appetite in check on busy days. I crammed tortilla chips, shredded cheese, and all manner of fixings onto sheets of foil and melted, toasted, and roasted the whole shebang over low-burning coals. My baby and I weren’t the only ones satisfied; our staff and guests loved my mess of ingredients, and I began making extra to share. This recipe is for four individual but shareable portions. For meat lovers, top with cooked ground beef or pork.Makes 4 servings
- 1 tablespoon olive oil
- 4 extra-large handfuls corn tortilla chips
- One 15-ounce can black beans, drained
- 1 cup Roasted Corn Salsa or store-bought corn salsa
- 2/3 cup quick pickled red onions or store-bought jalapeño pickles
- 1 cup shredded cheddar cheese
- Sliced green onions, hot sauce, and plain yogurt or sour cream for topping (optional)
Put four 12-inch sheets of aluminum foil on a flat surface and grease with the olive oil. Place a generous handful of tortilla chips in the center of each foil sheet. Divide the black beans, salsa, and pickled onions evenly over each pile of chips. Sprinkle 1/4 cup of the cheese over each serving.
Fold up two sides of the foil to meet in the middle and fold the edges over each other to seal the top. Then fold the two open ends of the foil to seal the packet. Place the foil packets over direct heat and cook for about 5 minutes. Open the packets carefully to allow steam to escape. If the cheese is not melted, return to the heat for a few minutes more before digging in.
Serve the nachos directly from the foil—fewer plates to clean!—and top with green onions, hot sauce, and a dollop of yogurt, if desired. Demolish these—leftovers don’t keep well.
Note: To prepare at home, preheat the oven to 350 F. Line a rimmed baking sheet or dish with aluminum foil and assemble the nachos as directed. Bake for about 10 minutes, until cheese is melted.
Roasted Corn Salsa
Every camp needs a jar of salsa. Or two. Or three. Served with tortilla chips, salsa provides a quick, hearty snack for hungry campers. This roasted corn salsa spiffs up eggs and nachos in a heartbeat. After making this once, you’ll probably want to double the next batch and keep extra on hand. Don’t bypass roasting the corn—it makes the salsa. Spring onions, also called green onions, are often available at the supermarket alongside scallions. They are sweeter and milder than a red or yellow onion but have more bite than scallions (which are best used for garnish). They also add a perfect kick to this salsa without destroying your breath for the rest of the day. You’ll be grateful you took the time to toast and crush whole coriander seeds, which add a nutty dimension to the spice’s citrus characteristics.Makes 2 1/2 cups
- 2 cups seeded and finely diced plum tomatoes
- 1/2 cup diced spring onions
- 2 tablespoons olive oil, or as needed
- 2 tablespoons lemon or lime juice
- 2 teaspoons apple cider vinegar
- 1 teaspoon honey
- 1 teaspoon grated garlic
- 1 teaspoon Sriracha or 1 jalapeño chile, seeded and minced
- 1 teaspoon kosher salt
- 1 teaspoon toasted coriander seeds, crushed
- 3 ears corn, shucked
Cook: Fire the grill or campfire to medium-high heat and position the grill grate 2 to 4 inches above the coals.
Place the ears of corn over direct heat and, using tongs, rotate every 2 to 3 minutes until the ears are uniformly charred and the kernels bright yellow, 10 to 12 minutes. For a darker char, drizzle olive oil over the corn so it drips onto the coals and the flames jump up to lick the corn.
Using a sharp chef’s knife, hold an ear of corn at a slant so one end is resting on a clean surface or in the base of a bowl. Slice the kernels off the cob by drawing the knife down from the top end to the bottom. Transfer the kernels to the container with the tomato mixture and stir to incorporate.
Serve immediately. Store leftovers in an airtight container, chilled, for up to 5 days.
Quick Pickles
Quick pickles have several benefits. You don’t have to wait for the fermentation process, and they can add a tart crunch to any dish within minutes of making them. Even better, they last for a couple of months in the fridge, continuing to evolve in flavor. And above all, vinegar and salt are natural preservatives, making quick pickles travel-worthy condiments that belong at camp. Here’s my basic pickle brine and suggested vegetables to use. You can also play with flavor variations, such as adding 2 garlic cloves, 1 teaspoon mustard seeds, and 1/2 teaspoon dill seed to the jar when brining.Makes one 8-ounce jar
- 1 cup apple cider vinegar, or as needed
- 2 tablespoons honey
- 1 tablespoon kosher salt
- 1 large red onion, halved and thinly sliced (or other vegetables of your choice)
Pack your prepared vegetable(s) into the jar, making sure they are submerged in the brine. If the vegetables aren’t covered, add more vinegar as needed. Seal the jar tightly and shake again to incorporate any added vinegar.
Chill for at least 10 minutes, or up to 2 months, before serving.
Recipes reprinted with permission from “Feast by Firelight,” text and illustrations copyright 2018 by Emma Frisch. Published by Ten Speed Press, an imprint of Penguin Random House LLC. Photographs copyright 2018 by Christina Holmes.