Ask the Builder: Can’t Trade Up? Finish New Space in Your Home

If buying a bigger house is not in your budget, creating more space in your current house is always an option.
Ask the Builder: Can’t Trade Up? Finish New Space in Your Home
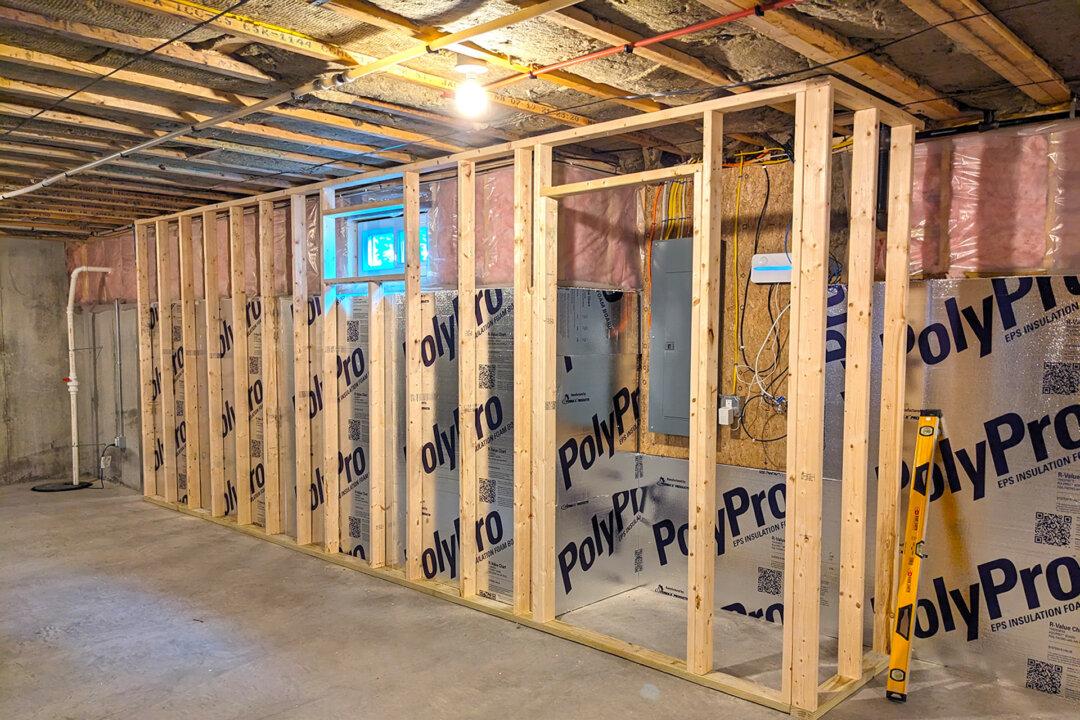
I'm helping my son transform his basement into 1,300 square feet of wonderful finished living space. There will even be an old-fashioned speakeasy in it! Tim Carter/Tribune Content Agency/TNS
Updated:
0:00

With home loan interest rates higher than they’ve been in years, you may not be able to move to a larger home. You might be able to obtain the added space you need by transforming unfinished space to delightful rooms.

Just a few weeks ago, I started to help my son increase the finished living space in his home by nearly 80 percent! Two years ago he bought a new home that has a full basement. Fortunately, the builder installed an outdoor bulkhead with a set of concrete steps. This created the all-important egress door required by almost all codes.

You should do what my son did before you even think of buying any materials. I told him to reach out to the city building department. His job was to discover all of the minimum requirements that apply to basement refinishing. Fortunately, the building department had a very clear set of guidelines that must be met to successfully obtain a building permit.

The guidelines and requirements discussed minimum ceiling height, ventilation, insulation and heating, and the all-important egress requirement. Some windows meet the egress requirement. Don’t underestimate the importance of egress. You need to have two ways to exit most spaces in the event of a fire.

Once you determine that you can meet the minimum requirements of your local building code, then it’s time to draw up a plan. My son saved about $8,000 by drawing his own plan. He used simple software, and with my help he created a plan that the building department accepted. In almost all cases, the building department will accept hand-drawn plans that you create using a pencil, ruler and paper.

The plan doesn’t need to be fancy. You can see my son’s plan, should you think it will inspire you to do your own, by going to the link below. Be sure to put the word go followed by a period before the word askthebuilder: https://go.askthebuilder.com/planbasement

A remodeling project like this proceeds much like building a home or room addition. It’s very important to do the work in a specific order so you don’t make things harder than they need to be. Be sure to check with your local building department about when all the required inspections must happen. You don’t want to cover up things that must be seen by an inspector.

Here are the steps my son and I will follow. I’ve lost count of the number of basement remodel jobs I’ve done for clients in the past, but each job progressed like this.

In cold climates, I like to add closed-cell foam or open-cell with a protective vapor barrier to the smooth concrete walls. The next step is to install all the framing. Don’t forget that any wood that contacts a concrete floor or wall must be treated lumber. You can purchase treated lumber meant for interior use at most old-fashioned lumber yards.

To save time and money, I anchor the bottom wall plates to concrete using a rotary hammer drill equipped with a 1/4-inch bit. I drill through the wall plate once it’s in place and then into the concrete about 3 inches. I take two 16d sinker nails, place them side-by-side and drive them into the hole. If you’re using framing gun nails, try three of those side-by-side. They do a superb job of anchoring the wall so it won’t move sideways.

After all the framing is complete, it’s time to install any HVAC ducting or ventilation pipes. These often are more than 4 inches in diameter. You need all the space you can muster to get them to go where you want.

Plumbing drains and water lines are next, followed by electrical wiring. Low-voltage wiring for cable TV, speakers, etc., is last. It’s now time for most inspections. Once you pass these inspections, get out your video camera and record talking videos of all the walls. Describe what you’re looking at. These videos will be so handy years from now if you’re wondering what is behind the drywall!

It’s now time to add any additional insulation and a vapor barrier. Next up is drywall. Be sure to screw it to the walls. Try to use large pieces to minimize flat seams. The drywall should be hung horizontally. Skim coat the drywall to eliminate joint-banding. You can also eliminate it using a special primer/sealer paint.

After you finish the drywall, paint it. You can do small touch-up painting after all the other work is complete. In my son’s basement, the ceilings will be suspended. I try to do this all the time so I have access to anything in the floor joists above.

Once the ceiling is finished, my son and I will install luxury vinyl plank flooring (LVP). It’s so easy to install at this point in the finishing process because there are no baseboards or door jambs in the way. When the flooring is finished, it’s time to install all the interior doors and any trim. I like to paint all of this wood before it’s installed. This minimizes paint spills on the LVP.

All other finish carpentry happens in the final stage. Be sure to put down tarps as you work on the finished flooring. Remember, I offer DIY phone coaching if you need help!

Dear Readers: We would love to hear from you. What topics would you like to read about? Please send your feedback and tips to [email protected].
Tim Carter
Tim Carter
Author
Tim Carter is the founder of AsktheBuilder.com. He's an amateur radio operator and enjoys sending Morse code sitting at an actual telegrapher's desk. Carter lives in central New Hampshire with his wife, Kathy, and their dog, Willow. Subscribe to his FREE newsletter at AsktheBuilder.com. He now does livestreaming video M-F at 4 PM Eastern Time at youtube.com/askthebuilder. (C)2022 Tim Carter. Distributed by Tribune Content Agency, LLC.
Related Topics