Add a Window Seat for Storage

The seat must be sized properly otherwise it will be uncomfortable to sit on.
Add a Window Seat for Storage
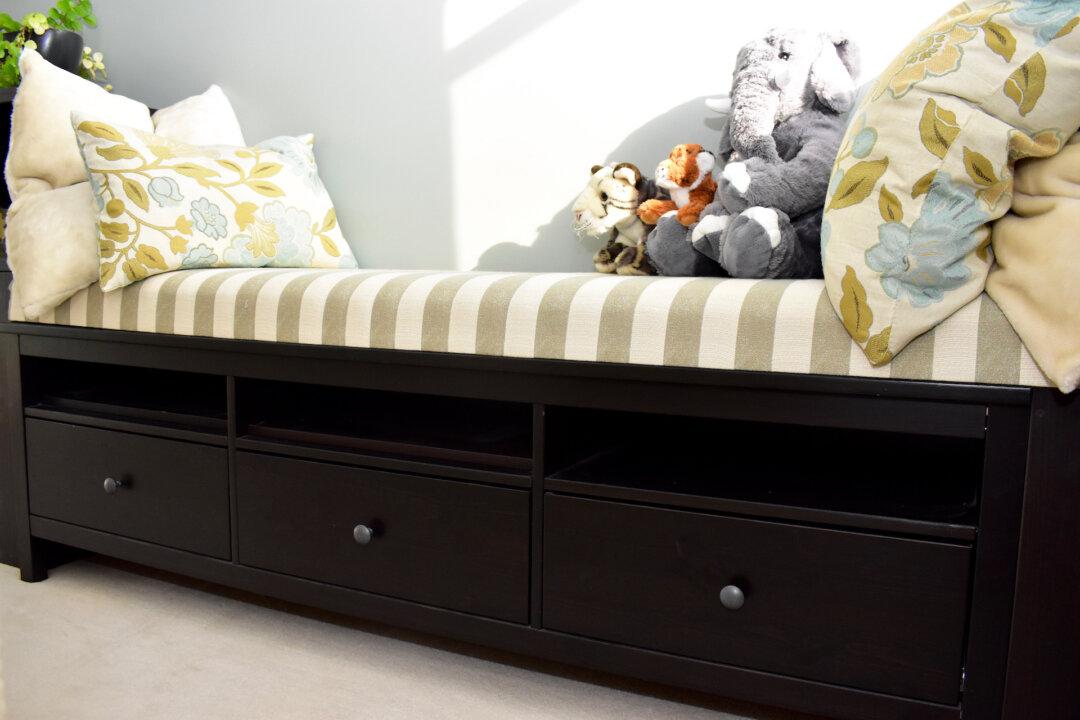
Window seat storage isn't as popular as before but it's a great option if you want more storage space. Klem Mitch/Shutterstock
Updated:
0:00

Dear James: We could certainly use some additional storage space in our bedrooms. As kids, we used to have window seats for storage. What are some simple design options?—Angela B.

Dear Angela: Window seats are not as popular in modern homes as they used to be, but they are an excellent option for additional bedroom storage space. The space in front of a window is seldom used for anything, so the floor space for the window seat will likely not be missed. It also is a nice bright place to sit and read.

For even more storage space, build some floor-to-ceiling bookshelves on each side of the window seats. If they use the same materials and basic design features, the bookshelves will complement the window seat. They are also ideal for taller items that may not fit in a window seat.

First, you must determine the size and basic design of the window seat before you can purchase the building materials. This is more important than most people think. If the seat is not sized properly, it will be uncomfortable to sit on for any length of time.

As a rule of thumb, a seat, including the thickness of the cushion (remember that it will compress when sat upon), is about 18 inches. The depth of the seat should be about 20 inches. If the seat is not deep enough, you will feel like you are constantly slipping off of it. If it is too deep, there will not be any back support from the partial wall behind it.

Next, determine the basic design of whether the window seat will open from the top or the front for storage. A design with a hinged top is the most convenient for accessing items in the window seat without bending over. Be aware, though: It may also quickly become just a dumpster when your children straighten up (yeah, right!) their rooms.

Since items must be literally placed in a design with a hinged front, this takes care of the dumpster problem and also allows for a shelf inside. The only drawbacks are that you have to bend over for access, and items in the back tend to be forgotten.

Either design can be relatively easy to build. For a top-opening design, build a frame using two-by-four lumber, and cover it with hardwood or plywood. Using stained solid hardwood or veneer with two coats of clear urethane is most attractive. A plywood side with a coat of paint is probably easier to do. This allows you to use wood filler in the gaps from uneven saw cuts.

The simplest top design uses standard hinges at the back of the seat. These hinges will extend up a little, so be careful that the cushion does not get damaged. For a more finished look, contact a professional cabinet supply outlet for recessed hinges that are hidden when the top is closed.

If you prefer a front-opening design, build the framing the same way as above. Cover the top and leave the front open. Check with a kitchen cabinet company about getting a cabinet front with the door and hinges already attached. Just nail or screw it into place and you are done.

(Courtesy of James Dulley)
Courtesy of James Dulley
Dear Readers: We would love to hear from you. What topics would you like to read about? Please send your feedback and tips to [email protected].
James Dulley
James Dulley
Author
Send your questions to Here's How, 6906 Royalgreen Dr., Cincinnati, OH 45244, or visit Dulley.com. To find out more about James Dulley and read features by other Creators Syndicate writers and cartoonists, visit the Creators Syndicate website at Creators.com. Copyright 2021 Creators.com
Related Topics